Experiment 1
Working with Maven: Creating a Maven Project, Understanding the POM File
Steps to Get Output :
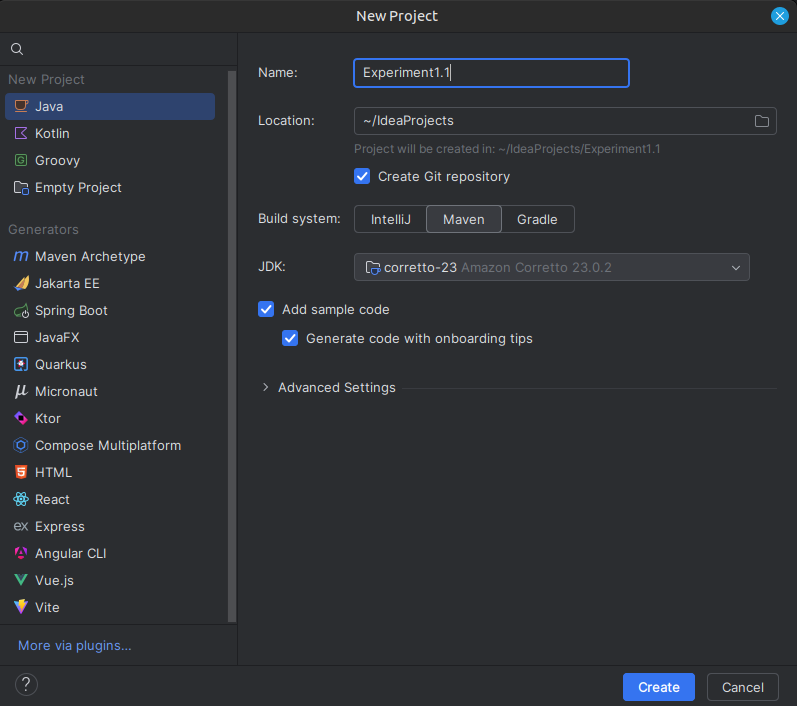
Create a New Maven Project:
- Open IntelliJ IDEA.
- Go to File > New > Project.
- Select Maven from the project types.
- Set the project name and location, then click Finish.
Create a Simple Website (HTML, CSS, and Logo):
- In the src/main/resources folder, create an index.html file, a style.css file, and place the image.png image.
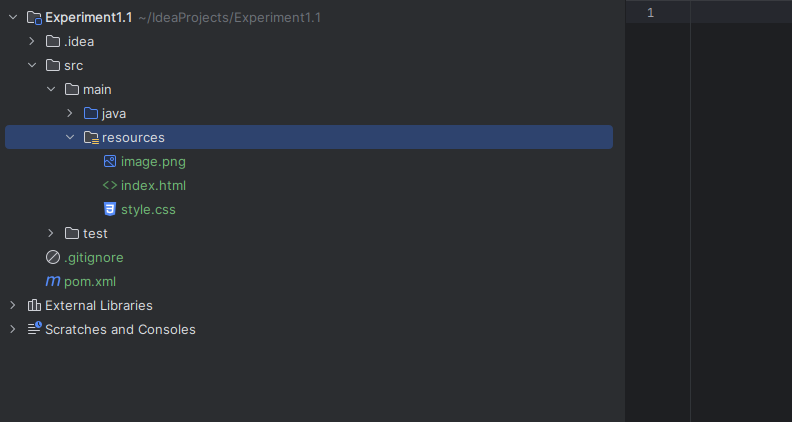
- In the src/main/resources folder, create an index.html file, a style.css file, and place the image.png image.
Example of a simple index.html:
<!DOCTYPE html>
<html lang="en">
<head>
    <meta charset="UTF-8">
    <meta name="viewport" content="width=device-width, initial-scale=1.0">
    <title>My Simple Website</title>
    <link rel="stylesheet" href="style.css">
</head>
<body>
    <header>
        <img src="image.png" alt="Logo">
    </header>
    <h1>Welcome to My Simple Website</h1>
</body>
</html>
Example of style.css:
body {
    font-family: Arial, sans-serif;
    text-align: center;
    margin: 0;
    padding: 0;
    background-color: #f9f9f9;
}

header {
    background-color: #333;
    padding: 10px;
}

header img {
    height: 50px;
}

h1 {
    color: #333;
    margin-top: 20px;
}- Upload the Website to GitHub:
- Initialize a Git repository in your project folder:
git init- Add your files and commit them:
git add .
git commit -m "Initial commit"- Create a GitHub repository and push the local project to GitHub:
git remote add origin <your-repository-url>
git push -u origin master
Experiment 2
Installing and Setting Up Gradle in IntelliJ IDEA
Creating a Gradle Project in IntelliJ IDEA:
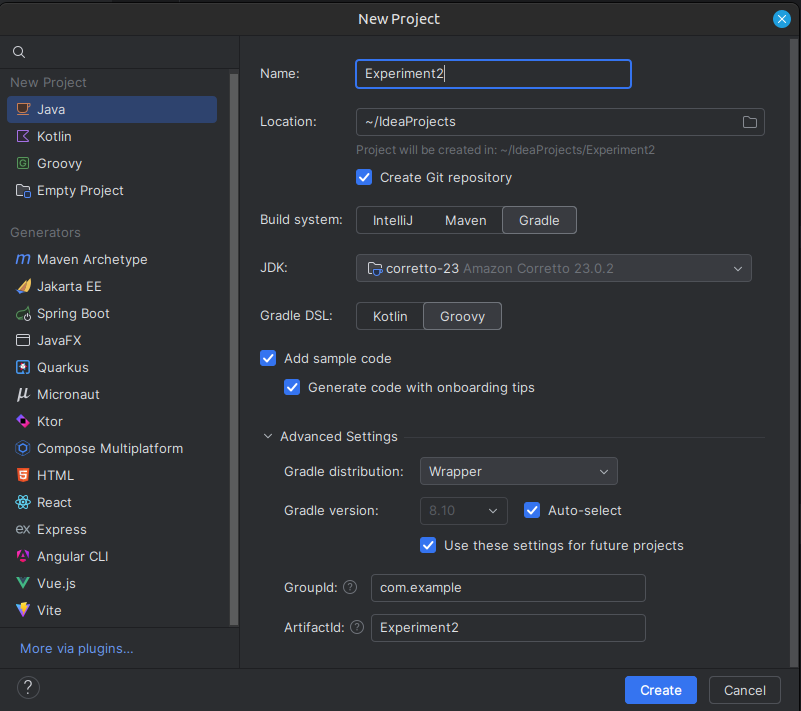
Step 1: Open IntelliJ IDEA and Create a New Project
- Click on "New Project".
- Select "Gradle" (under Java/Kotlin).
- Choose Groovy or Kotlin DSL (Domain Specific Language) for the build script.
- Set the Group ID (e.g., com.example).
- Click Finish.
Step 1: Modify build.gradle (Groovy DSL) (Copy paste the entire code, or you can just change if "id" to "application")
plugins {
    id 'application'
}

repositories {
    mavenCentral()
}

dependencies {
    testImplementation 'org.junit.jupiter:junit-jupiter:5.8.1'
}

application {
    mainClass = 'com.example.Main'
}
Step 2: See the Project Structure
my-gradle-project
├── build.gradle (Groovy Build Script)
├── settings.gradle
└── src
    ├── main
    │   ├── java
	|	|	└── com.example
	|	|		└── Main     <--- You need to edit this
    │   └── resources
    └── test
        ├── java
        └── resources
Step 3: edit Main.java in src/main/java/com/example
package com.example;

public class Main {
    public static void main(String[] args) {
        System.out.println("Hello from Gradle!");
    }
}
Step 3: Build and Run the Project
- Press
ALT + F12to open terminal.
gradle runHosting a Static Website on GitHub Pages
Step 1: Create a /docs Directory
- Create docs inside the root folder (not in src).
- Add your HTML, CSS, and images inside /docs.
Step 2: Modify build.gradle to Copy Website Files (This is optional)
task copyWebsite(type: Copy) {
    from 'src/main/resources/website'
    into 'docs'
}
Step 3: Commit and Push to GitHub
git add .
git commit -m "Deploy website using Gradle"
git push origin main
Step 4: Enable GitHub Pages
- Go to GitHub Repo -> Settings -> Pages.
- Select the /docs folder as the source.
Your website will be hosted at:
https://yourusername.github.io/repository-name/Experiment 3
Working with Gradle: Setting Up a Gradle Project, Understanding Build Scripts
exact same as 2nd one copy same
Step 1: Open IntelliJ IDEA and Create a New Project
- Click on "New Project".
- Select "Gradle" (under Java/Kotlin).
- Choose Groovy or Kotlin DSL (Domain Specific Language) for the build script.
- Set the Group ID (e.g., com.example).
- Click Finish.
Step 1: Modify build.gradle (Groovy DSL) (Copy paste the entire code, or you can just change if "id" to "application")
plugins {
    id 'application'
}

repositories {
    mavenCentral()
}

dependencies {
    testImplementation 'org.junit.jupiter:junit-jupiter:5.8.1'
}

application {
    mainClass = 'com.example.Main'
}
Step 2: See the Project Structure
my-gradle-project
├── build.gradle (Groovy Build Script)
├── settings.gradle
└── src
    ├── main
    │   ├── java
	|	|	└── com.example
	|	|		└── Main     <--- You need to edit this
    │   └── resources
    └── test
        ├── java
        └── resources
Step 3: edit Main.java in src/main/java/com/example
package com.example;

public class Main {
    public static void main(String[] args) {
        System.out.println("Hello from Gradle!");
    }
}
Step 4: Build and Run the Project
- Press
ALT + F12to open terminal.
gradle runHosting a Static Website on GitHub Pages
Step 1: Create a /docs Directory
- Create docs inside the root folder (not in src).
- Add your HTML, CSS, and images inside /docs.
Step 2: Modify build.gradle to Copy Website Files (This is optional)
task copyWebsite(type: Copy) {
    from 'src/main/resources/website'
    into 'docs'
}
Step 3: Commit and Push to GitHub
git add .
git commit -m "Deploy website using Gradle"
git push origin main
Step 4: Enable GitHub Pages
- Go to GitHub Repo -> Settings -> Pages.
- Select the /docs folder as the source.
Your website will be hosted at:
https://yourusername.github.io/repository-name/Experiment 4
Gradle Kotlin DSL: Setting Up & Building a Kotlin Project in IntelliJ IDEA
Finally fixed this Nonsense
Setting Up the Gradle Project
Step 1: Create a New Project
- Open IntelliJ IDEA.
- Click on File > New > Project.
- Give a Project name
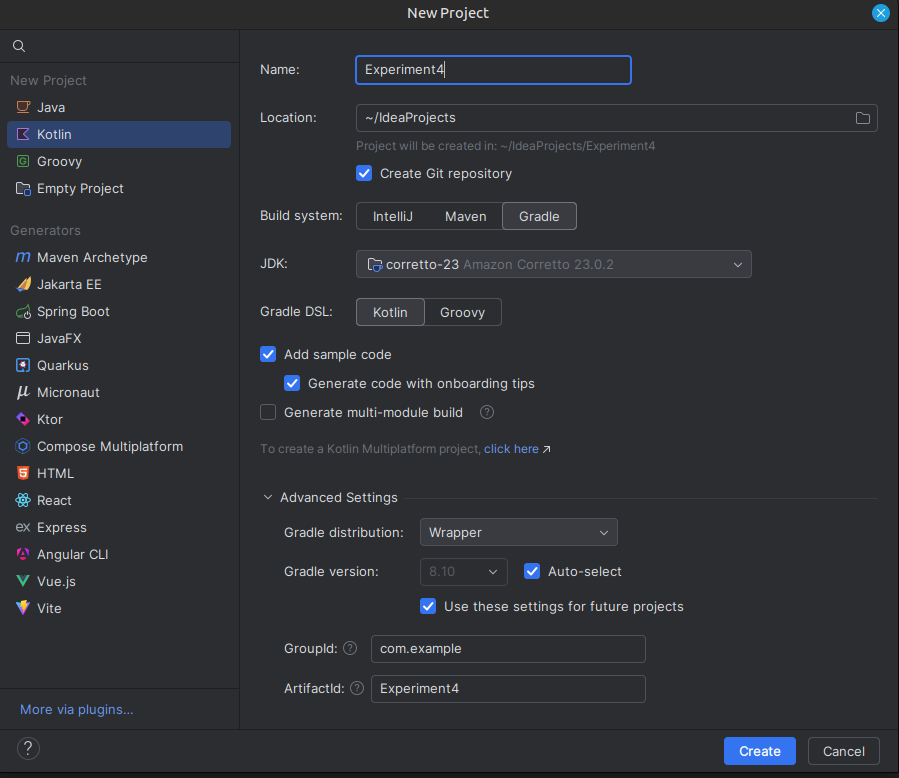
Note down the java JDK version carefully in this step !!! Also Note Down the GroupID in my case com.example is the default, yours might be org.example also i'll be using jdk version 21 so be careful.
Observe in the project structure, that there is no org.example or com.example.... you need to create a org.example or com.example folder under kotlin folder.
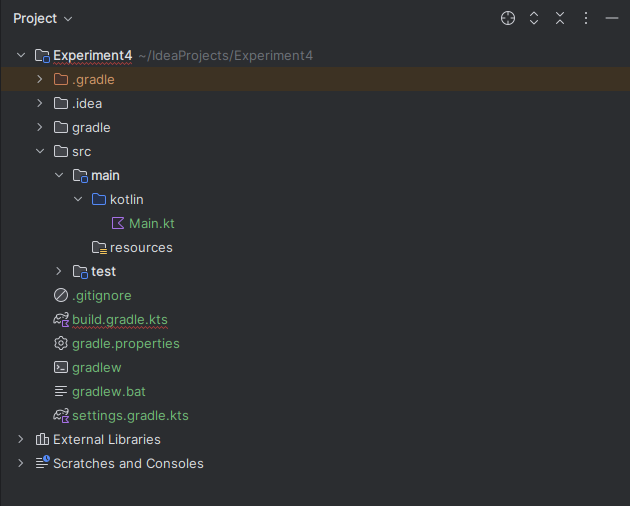
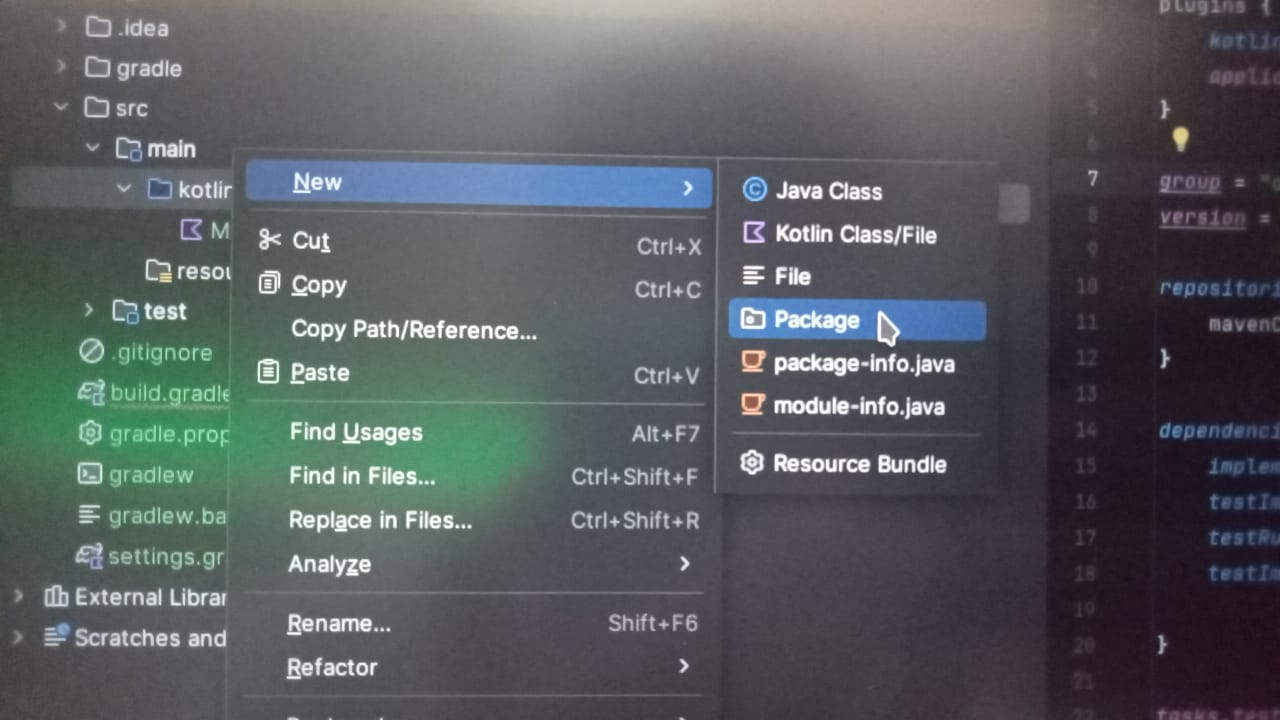
next drag and drop the Main.kt file inside the org.example folder.
Editing the Main Kotlin File
Copy paste this Main.kt file. Be careful about org.example or com.example.
package com.example

fun main() {
    println("Hello, Gradle with Kotlin DSL!")
}
Understanding build.gradle.kts
Copy paste this code to build.gradle.kts and make the necessary changes:
import org.jetbrains.kotlin.gradle.tasks.KotlinCompile

plugins {
    kotlin("jvm") version "2.1.10"  // this version can be a problem sometimes
    application
}  // alternatively try with "1.8.10"

group = "com.example"  //change to org.example if thats your default groupID
version = "1.0-SNAPSHOT"

repositories {
    mavenCentral()
}

dependencies {
    implementation(kotlin("stdlib"))
    testImplementation("org.junit.jupiter:junit-jupiter-api:5.8.2")
    testRuntimeOnly("org.junit.jupiter:junit-jupiter-engine:5.8.2")
}

tasks.test {
    useJUnitPlatform()
}

tasks.withType<KotlinCompile> {
    kotlinOptions.jvmTarget = "21" // Match with your JDK version !!!
}

kotlin {
    jvmToolchain(21)  // Here too !!
}

application {
    mainClass.set("com.example.MainKt") // Use your package + filename here
}
Building and Running the Project
Build the Project
./gradlew buildRun the Project
./gradlew runPackaging as a JAR
To run the project without Intellij, we need a JAR file.
- Create a Fat (Uber) JAR Modify build.gradle.kts:
tasks.register<Jar>("fatJar") {
    archiveClassifier.set("all")
    duplicatesStrategy = DuplicatesStrategy.EXCLUDE
    manifest {
        attributes["Main-Class"] = "com.example.MainKt" //change to org.example if your groupId is org.example
    }
    from(configurations.runtimeClasspath.get().map { if (it.isDirectory) it else zipTree(it) })
    with(tasks.jar.get() as CopySpec)
}- Build the Fat JAR
./gradlew fatJarThis command will create a jar file inside build/libs. locate the file 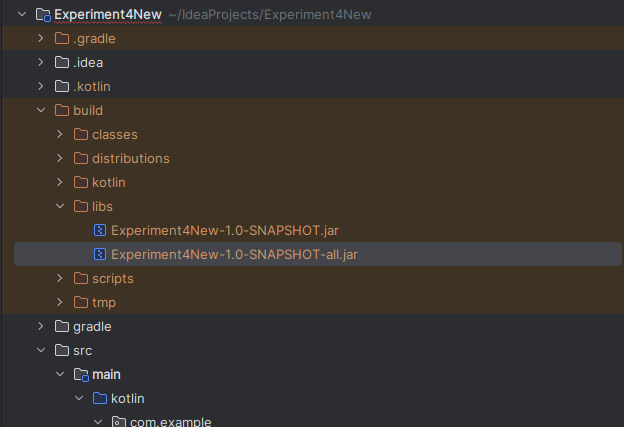
- Run the Fat JAR
java -jar build/libs/Experiment4New-1.0-SNAPSHOT-all.jarNote your filename may be different so replace with build/libs/FILENAME-all.jar, replaceing FILENAME with your project filename.
Experiment 5
Build and Run a Java Application with Maven, Migrate the Same Application to Gradle
Create and Build a Java Application with Maven
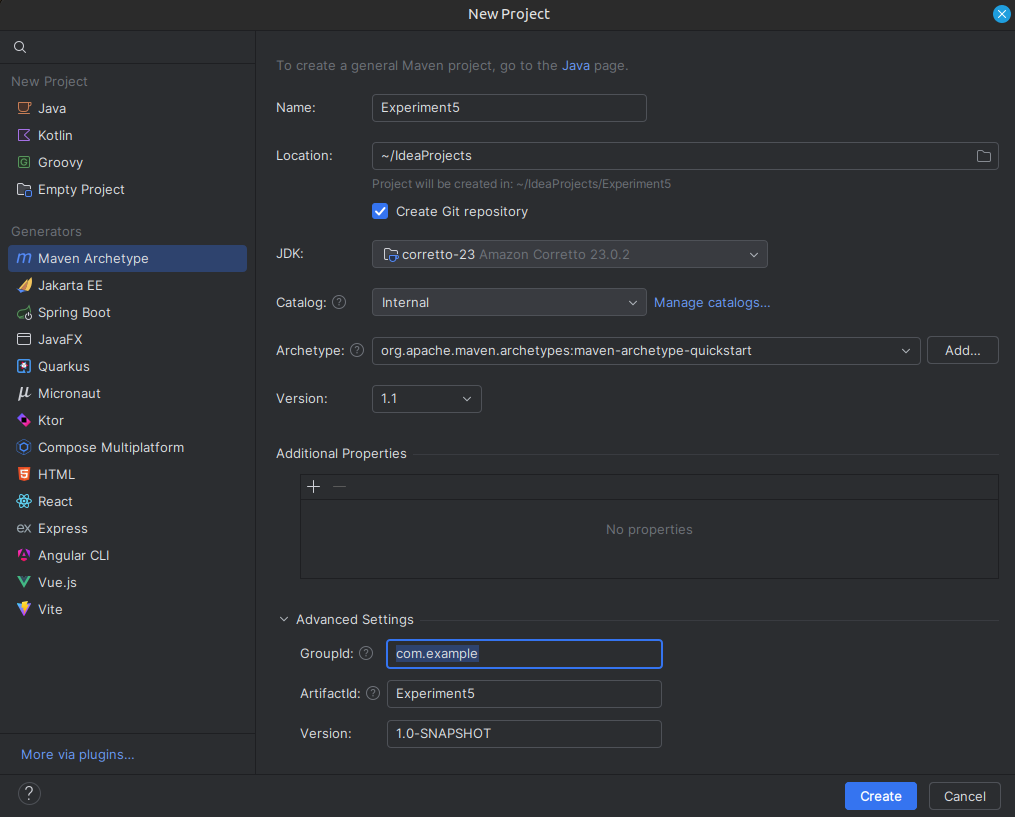
Create a Maven Project in IntelliJ IDEA
- Open IntelliJ IDEA
- Launch IntelliJ IDEA and click on File -> New -> Project.
- Select Maven
- In the New Project window, choose Maven from the options on the left.
- Check Create from archetype and select maven-archetype-quickstart.
- Click Next.
- Wait for IntelliJ to Load Dependencies
- IntelliJ will automatically download the Maven dependencies, so just relax for a moment.
- Open IntelliJ IDEA
Update pom.xml to Add Build Plugin. Copy paste this entire shit.
<project xmlns="http://maven.apache.org/POM/4.0.0"
         xmlns:xsi="http://www.w3.org/2001/XMLSchema-instance"
         xsi:schemaLocation="http://maven.apache.org/POM/4.0.0
                             http://maven.apache.org/xsd/maven-4.0.0.xsd">

  <modelVersion>4.0.0</modelVersion>

  <groupId>com.example</groupId>
  <artifactId>Experiment5</artifactId>
  <version>1.0-SNAPSHOT</version>
  <packaging>jar</packaging>

  <name>Experiment5</name>
  <url>http://maven.apache.org</url>

  <properties>
    <project.build.sourceEncoding>UTF-8</project.build.sourceEncoding>
  </properties>

  <dependencies>
    <dependency>
      <groupId>junit</groupId>
      <artifactId>junit</artifactId>
      <version>3.8.1</version>
      <scope>test</scope>
    </dependency>
  </dependencies>

  <build>
    <plugins>
      <!-- Compiler Plugin -->
      <plugin>
        <groupId>org.apache.maven.plugins</groupId>
        <artifactId>maven-compiler-plugin</artifactId>
        <version>3.8.1</version>
        <configuration>
          <source>1.8</source>
          <target>1.8</target>
        </configuration>
      </plugin>

      <!-- Jar Plugin -->
      <plugin>
        <groupId>org.apache.maven.plugins</groupId>
        <artifactId>maven-jar-plugin</artifactId>
        <version>3.2.0</version>
        <configuration>
          <archive>
            <manifest>
              <mainClass>com.example.App</mainClass>
            </manifest>
          </archive>
        </configuration>
      </plugin>
    </plugins>
  </build>

</project>- Build and Run the Maven Project Press Alt + F12 to open the terminal.
mvn clean compile
mvn package- After the above command a Jar file will be create find it inside the project directory structure :
D:\Idea Projects\MVNGRDLDEMO\target\Experiment5-1.0-SNAPSHOT.jar <---- This might be different in your system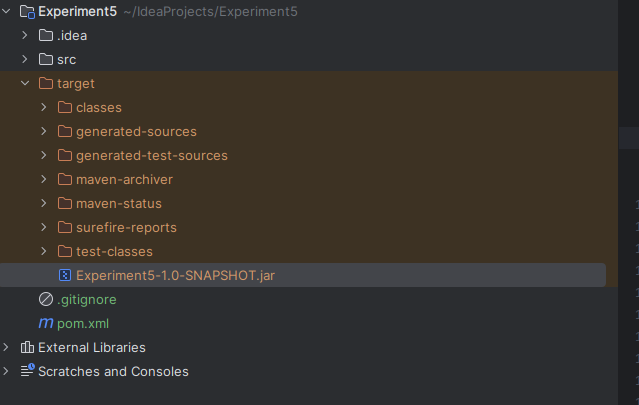
- Run the JAR File To run the generated JAR file, use:
java -jar target\Experiment5-1.0-SNAPSHOT.jarMigrate Maven Project to Gradle
Step 1: Initialize Gradle in Your Project
- Open terminal (if not open) using ALT + F12 and check if your in the project directory only :
cd "D:\Idea Projects\Experiment5"- Run Gradle Init Command Execute the following command to migrate your Maven project to Gradle:
gradle init --type pomThis command will convert your Maven pom.xml into a Gradle build.gradle file.
 select Groovy in this step and second question just hit enter.
Step 2: Add these lines to the end of existing build.gradle
group = 'com.example'
version = '1.0-SNAPSHOT'

jar {
    manifest {
        attributes(
            'Main-Class': 'com.example.App'
        )
    }
}
Step 3: Open terminal using ALT+F12 and run the build command
gradle clean buildStep 4: After the above command a Jar file will be create find it inside the project directory structure :
D:\Idea Projects\MVNGRDLDEMO\target\Experiment5-1.0-SNAPSHOT.jar <---- This might be different in your system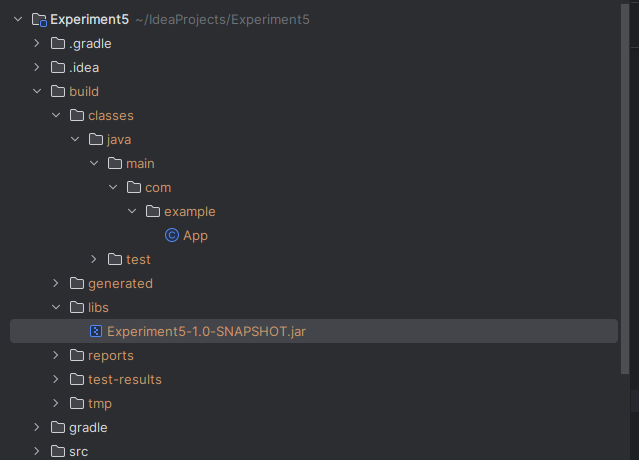 Step 5: Run the JAR File To run the generated JAR file, use:
java -jar build\libs\Experiment5-1.0-SNAPSHOT.jarExperiment 6
Jenkins Installation Guide
System Requirements
- Memory: 256 MB of RAM
- Disk Space: Depends on your projects
- Operating System: Windows, Mac, Ubuntu, Linux
- Java Version: Java 8 or 11 (JDK or JRE)
Installation on Windows - Step-by-Step Instructions
- Check if Java is installed
- Download the
jenkins.warfile from the official site - Open Command Prompt and run the following command:
java -jar jenkins.war --httpPort=8080- Open your browser and go to: http://localhost:8080
- Provide the admin password and complete the setup wizard
Jenkins Configuration - How to Change Jenkins Home Directory
- Navigate to:
Manage Jenkins➝Configure Systemto view your current JENKINS_HOME - Create a new folder where you want Jenkins to store its data
- Copy the contents of the old
JENKINS_HOMEto the new folder - Set or update the environment variable
JENKINS_HOMEto the new path - Restart Jenkins
Configuration File Reference:
jenkins.xml- Environment Variable:
JENKINS_HOME
Setting Up Git on Jenkins
Step-by-Step Git Plugin Setup
- Go to Manage Jenkins ➝ Manage Plugins
- Check the Installed tab to see if Git is already installed
- If not, go to the Available tab and search for Git
- Click Install to install the Git plugin
- After installation, verify that the Git option appears in the Job Configuration section
Creating Your First Job in Jenkins
Connecting Jenkins to a Git Remote Repository (e.g., GitHub)
- Get the URL of the remote Git repository (HTTPS or SSH)
- Add Git credentials to Jenkins:
- Go to Manage Jenkins ➝ Credentials
- Add the username/password or SSH key under the appropriate scope
- In your job's configuration:
- Go to the Source Code Management (SCM) section
- Select Git
- Enter the Git repository URL
- Add the credentials you created earlier
- Run the job and verify if the repository is successfully cloned
Jenkins Command Line Interface (CLI)
Why Use CLI?
Faster, easier, seamless integration with Jenkins.
How to Use Jenkins CLI
- Start Jenkins
- Go to:
Manage Jenkins➝Configure Global Security➝ Enable Security - Open your browser and visit:
http://localhost:8080/cli/ - Download the
jenkins-cli.jarand place it anywhere on your system - Test Jenkins CLI with the following command:bash
java -jar jenkins-cli.jar -s http://localhost:8080/ help --username <userName> --password <password>
User and Role Management in Jenkins - Creating Users and Assigning Roles
- Create new users from
Manage Jenkins➝Manage Users - Configure users as needed
- Install the Role-Based Authorization Strategy Plugin
- Go to
Manage Jenkins➝Manage Plugins➝ Available ➝ Search & Install - Restart Jenkins after installation
- Go to
- Go to:
Manage Jenkins➝Configure Global Security➝ Authorization ➝ Select Role-Based Strategy - Go to:
Manage Jenkins➝Manage and Assign Roles- Create Roles
- Assign Roles to Users
- Validate that authentication and authorization work as expected
Jenkinsfile – Pipeline as Code
Build ➝ Deploy ➝ Test ➝ Release
How to Create a Jenkinsfile
- Start Jenkins
- Install the Pipeline Plugin from
Manage Plugins - Create a new job
- In the job configuration, go to the Pipeline section:
- Select Pipeline Script
- Write or paste your
Jenkinsfilehere
- Run the job and verify the output
Jenkins Pipeline from Git SCM
Use Jenkinsfile from a Git Repository
- Create a new job or use an existing job (Job Type: Pipeline)
- Create a Git repository (e.g., on GitHub)
- Add a
Jenkinsfileto the repository - In the job configuration:
- Go to Pipeline ➝ Definition: Pipeline script from SCM
- SCM: Git
- Provide the repository URL
- Specify the Jenkinsfile location in the repo
- Save the job
- Run the job and validate the pipeline execution